IST356 Course Setup#
If you are taking IST356, odds are you want to pursue a career in data science or data anlytics. Concequentally, you will need to learn the tools and techiques used by those in the industry. This document will walk you through getting ready to code in this course.
🧑💻 Step 1: Install Prerequisite Software#
There are two ways you can code in this class:
Setup Your Computer - install everything on your machine. Your computer will need at least 16GB ram and 10GB of free disk space.
Use Github Codespaces - cloud hosted, no setup, works with any computer, but you are given a limited number of free compute.
Each has their pros / cons. I strongly suggest doing both.
To setup your computer, Go to: Installing Pre-Requisites and follow the instructions.
Once you setup your GitHub account you will have access to Codespaces
🏛️ Step 2: Github Account Linked to your netid#
Being an SU student comes with some perks. One of them is a Github for Education account and accompanying “packpack” of goodies. To use this benefit, your github account must be associated with your @syr.edu email.
IF YOU HAVE A GITHUB ACCOUNT ALREADY:#
Associate your current account with SU, by adding your email:
Go to to github and click Sign In
Once you have logged in, go to: settings/emails
Add and verify your SU email address.
IF YOU DO NOT HAVE A GITHUB ACCOUNT:#
You’ll need to create an account:
Go to to github and click Sign In
Follow the on-screen instructions to sign up for an account.
Make sure to use your @syr.edu email for the account.
Add your personal email when you’re at it so you don’t lose Github access after you graduate!
Github Backpack Access for Students#
Go to the Github Backpack site: https://education.github.com/pack
and click Sign Up For Student Developer PackOnce your account is verified, you will have backpack access.
You’ll know its active when you check your billing plan: settings/billing
you should see a credit here.Once you have backpack access, you can enable Github Copilot AI. settings/copilot
You will also have access to codepaces. features/codespaces
🍴 Step 3: Fork the Course Repository#
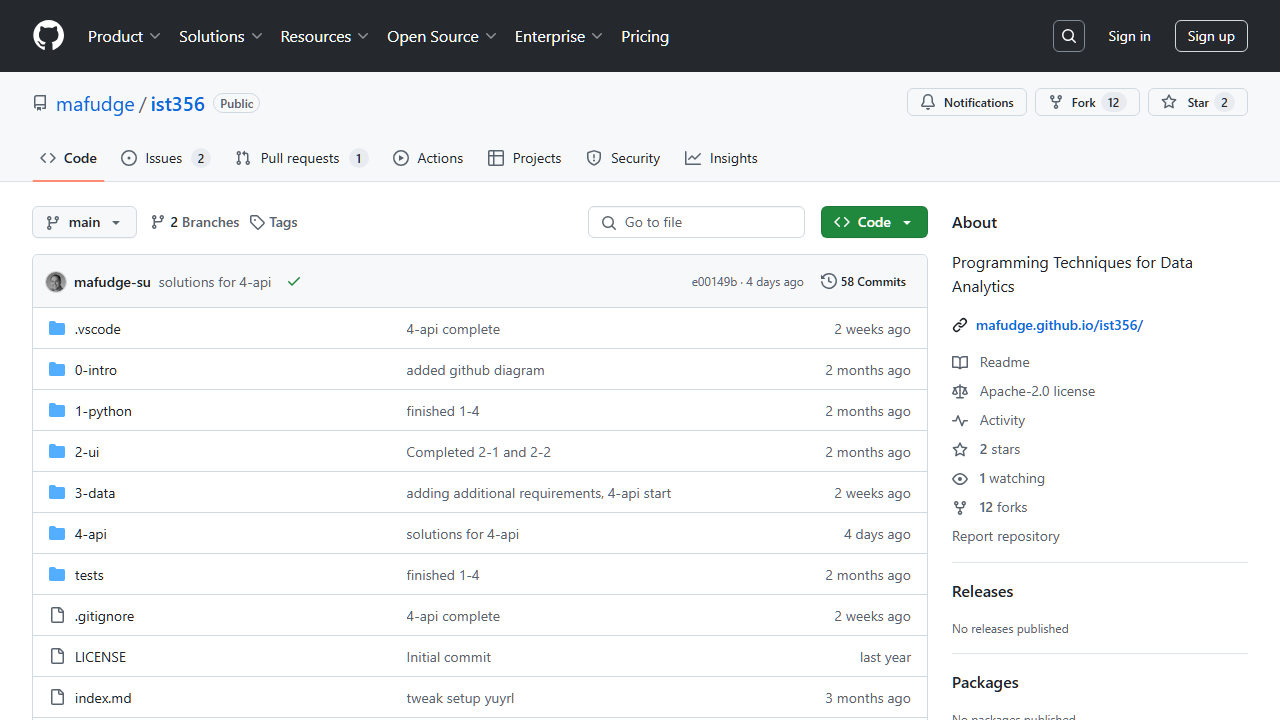
The course repository It’s like a mash-up between a textbook, lab environment, personal notebook, and coding environment. I think you will find it an awesome way to engage with the course.
A fork is your personal copy of the repository. The repository you forked from is called the upstream.
To make your fork:
Login to github with your Github Account
Create a fork of the Course Repository. Go to mafudge/ist356 and click the Fork button above the code button.
You will be presented with a screen to change the name of the repository. Leave it as is. Make sure the owner is your Github account, then click Create Fork
Once the fork completes, you will have a personal copy of the repo at YOURGITHUB/ist356
You will also see a new button Sync Fork you’ll need to click this if I make any updates to the upstream mafudge/ist356 which you would like in your personal copy.
📋 Step 4: Access the Course Repository#
Accessing the course repository is going to depend of whether you are using Your Computer or Github Codepsaces
On Your Computer:#
🔝 PREREQUISITE STEP 🔝 Create a folder for this course.
If you’re going to work on your computer, make a folder for all the course materials and assignments. Know where this folder is and how to open the terminal from it. If you are unfamiliar but would like to learn more, take this 15-minute course: https://cent-ischool.github.io/command-line-essentials/
Clone the repository (from the command line):
Open a terminal in your course folder.
Clone your fork (replace
YOURGITHUBwith your GitHub account):
git clone https://github.com/YOURGITHUB/ist356
This creates anist356folder inside your course folder containing the course repository.Switch to the cloned folder:
cd ist356Lauch VS Code:
code .
Open the dev container (from VS Code):
When VS Code opens the folder, it detects the
.devcontainerconfiguration and shows a notification in the bottom-right: “Reopen in Container” — click it.
(If you miss the notification, pressF1, type Dev Containers: Reopen in Container, and press ENTER.)The first time, VS Code downloads the container image — about 1.3 GB. Watch the progress in the bottom-right; click it to view the log so you can see it actually moving. On a slow connection this can take 20 minutes or more, and while it runs VS Code looks like it’s doing nothing. It isn’t stuck — it’s downloading.
To download it ahead of time with a real progress bar instead, rundocker pull mafudge/ist356:latestin a terminal first.When it finishes, the green button in the bottom-left corner reads Dev Container: IST356 Course Content. You’re now coding inside the container with Python, Jupyter, and everything else pre-installed. 🎉
On Github Codespaces:#
Login to github and go to your fork at YOURGITHUB/ist356
Click the green Code button, choose the Codespaces tab, and click Create codespace on main.
Wait for the codespace to build. When it’s ready you’ll have a full VS Code environment in your browser with the repository already cloned — no local setup required.
Next Steps?#
Try the Course Repository Walkthrough
This will explain how to use VS Code in this course to run, debug, etc.