ist346-content
Lab L - Web and API Services
In this lab you will learn about API’s (Application Programming Interfaces), specifically Web API’s. Web API’s are API’s that are accessible over the HTTP protocol. They represent the server-side behavior of the device-driven web of today: smart phones, intelligent speakers, smart TV’s, etc.
Specifically, we will create a Web API to keep track of craft Beers that you’ve consumed and your opinions of them. Typically, an API like this would be the data and business logic back-end for a Mobile application. A Smart Phone would be how the users interact with the application and any data would be sent over the cloud to the back-end service.
We will build out the back-tiers in an open-source, content-as-a-service platform known as Squidex https://squidex.io/. If this were a real working system, the architecture would look something like this:
+----------------+              +----------+     +---------+
| Mobile App     |              |Beer API  |     | MongoDb |
| iOS / Android  |---Internet---| Squidex  |-----| Data    |
| client Tier    |              |Bus. Logic|     | Storage |
+----------------+              +----------+     +---------+
Building a mobile application is beyond the scope of this lab, so instead we will simply use the curl command to connect to the web API we create.
Learning Objectives
- Understand how a back-end service platform works.
- Design a schema and generate permissions to access our API.
- Demonstrate how to call the API methods using the
curlutility.
Before you begin
Prep your lab environment.
- Open the PowerShell Prompt
- Change the working directory folder to
ist346-labs
PS > cd ist346-labs - Update your git repository to the latest version:
PS ist346-labs> git pull origin master - Change the working directory to the
lab-Lfolder:
PS ist346-labs> cd lab-L
Creating the API
As we said before, we use an open source project Squidex to create our Web API. Squidex is a headless content management system. It allows you to create custom content definitions (schema) and it will create an HTTP API that allows you to create, retrieve, update and delete (CRUD) your custom content.
- To start the environment:
PS C:\ist346-labs\lab-L> docker-compose up -d - Next, check to see the environment is up and running:
PS C:\ist346-labs\lab-L> docker-compose ps
You should see acurl-client,squidex_mongodatabase and thesquidex_squidexapplication. All should be Up. - Give it a minute and you should be able to go to http://localhost and see the Squidex login screen.
- Login to Squidex using
admin@example.comandmySecret123!. You will then come to the tutorial. Walk through the tutorial to understand the different features of Squidex. Once the tutorial is complete you should end up the screen shown below:
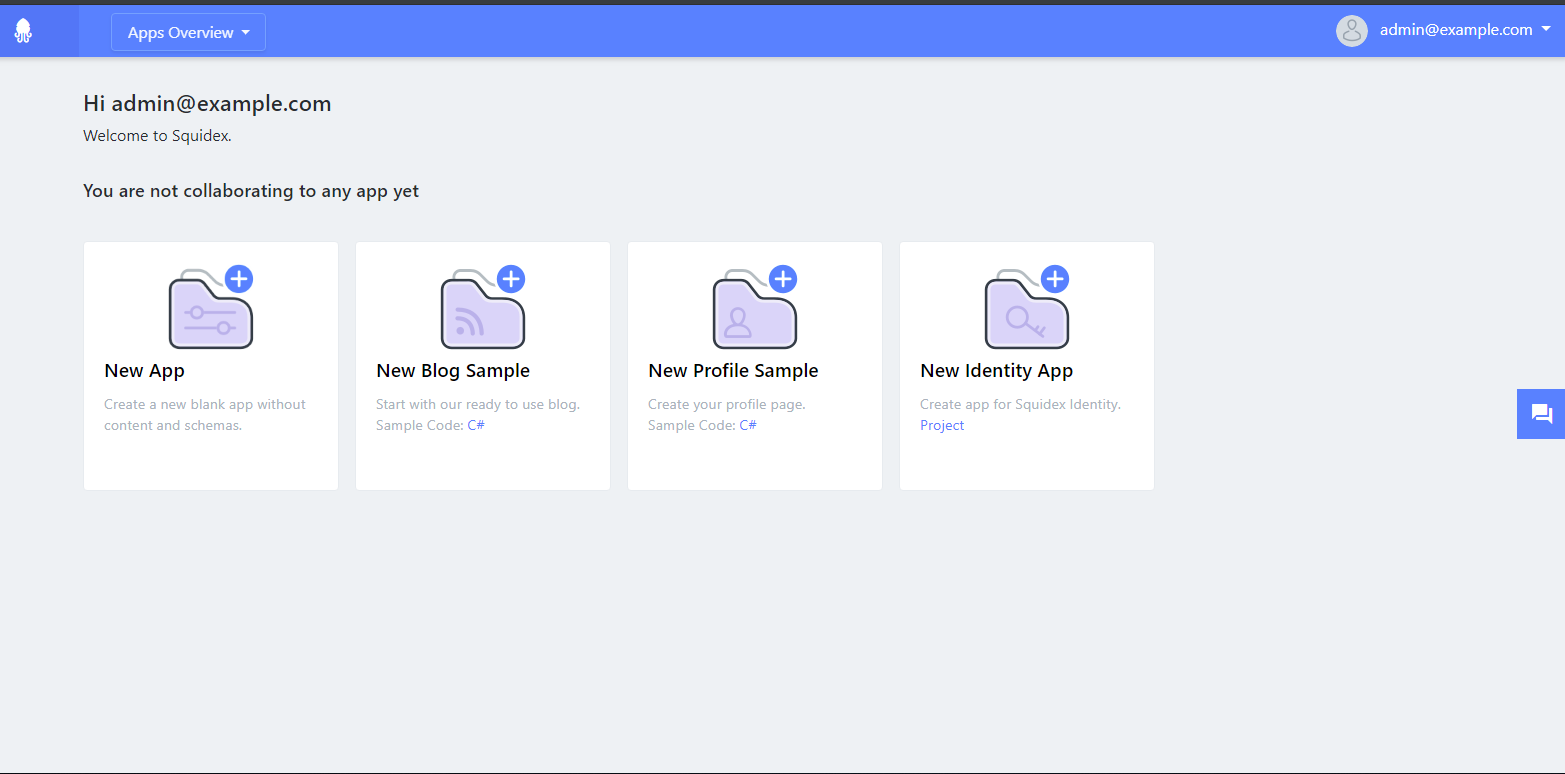
- The best way to explain a Web API is to create one!
Click on the New App button. And create a new app called my-beer-app
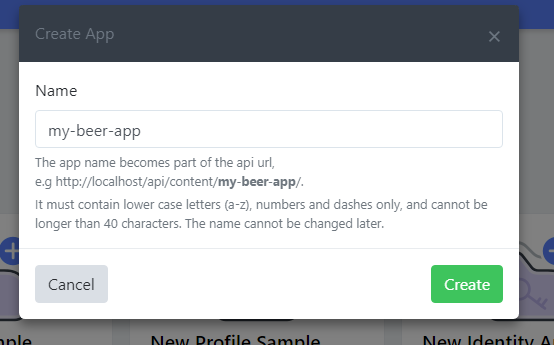
Notice how the name of your app becomes part of the URL. So to access our beer app web API, we will use:
http://localhost/api/content/my-beer-app/
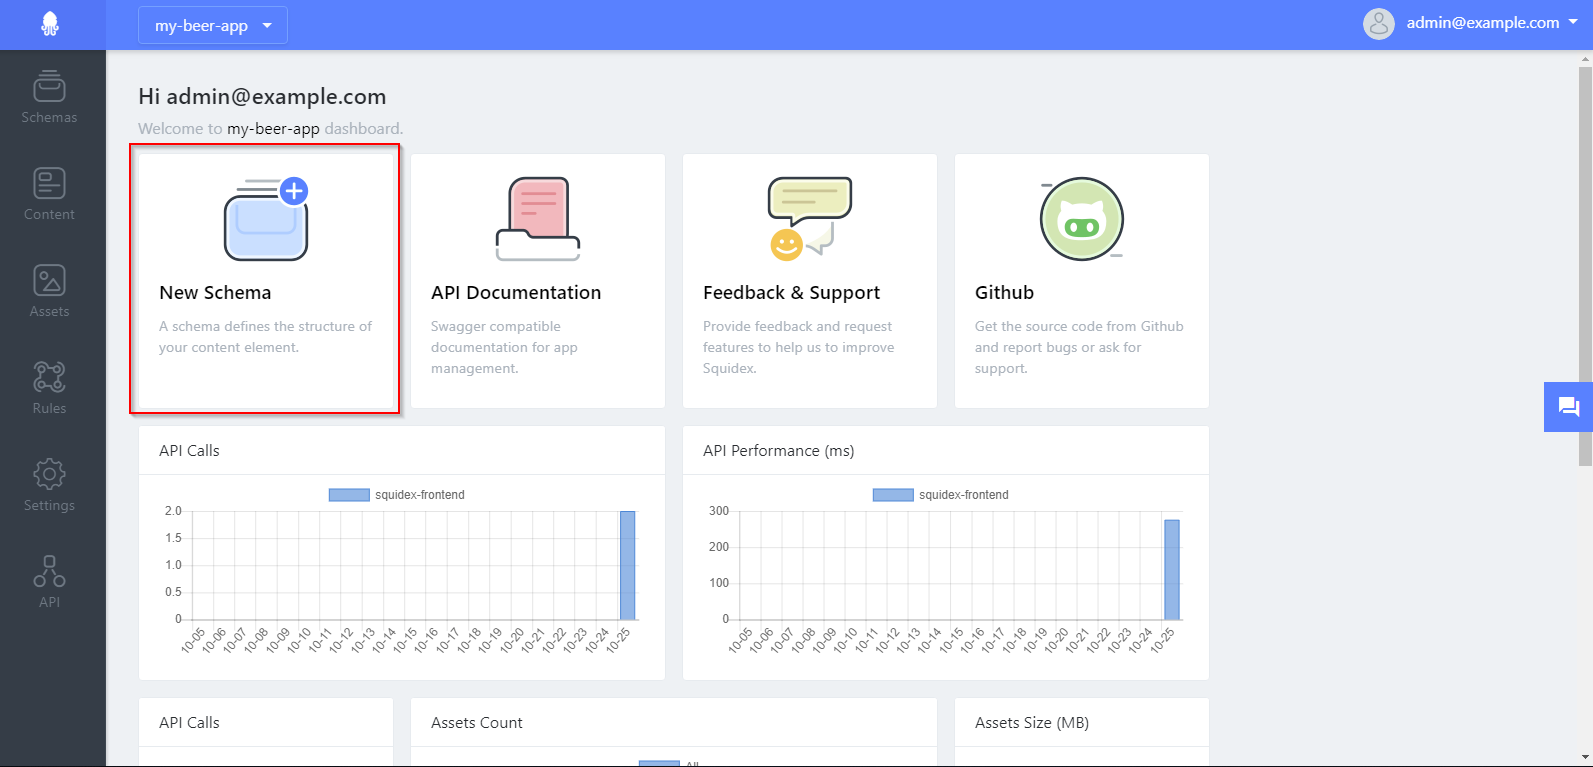
Be sure to click the Create button to continue! - Click on my-beer-app in the Squidex portal. This will bring you to the API dashboard for this app.
- Squidex allows you to define content based on schemas. To create a new schema for our beer app, click the New Schema button on the my-beer-app dashboard.
- When the dialog pops up enter the name beers. Notice again this becomes part of the API url. Click the Create button to continue.
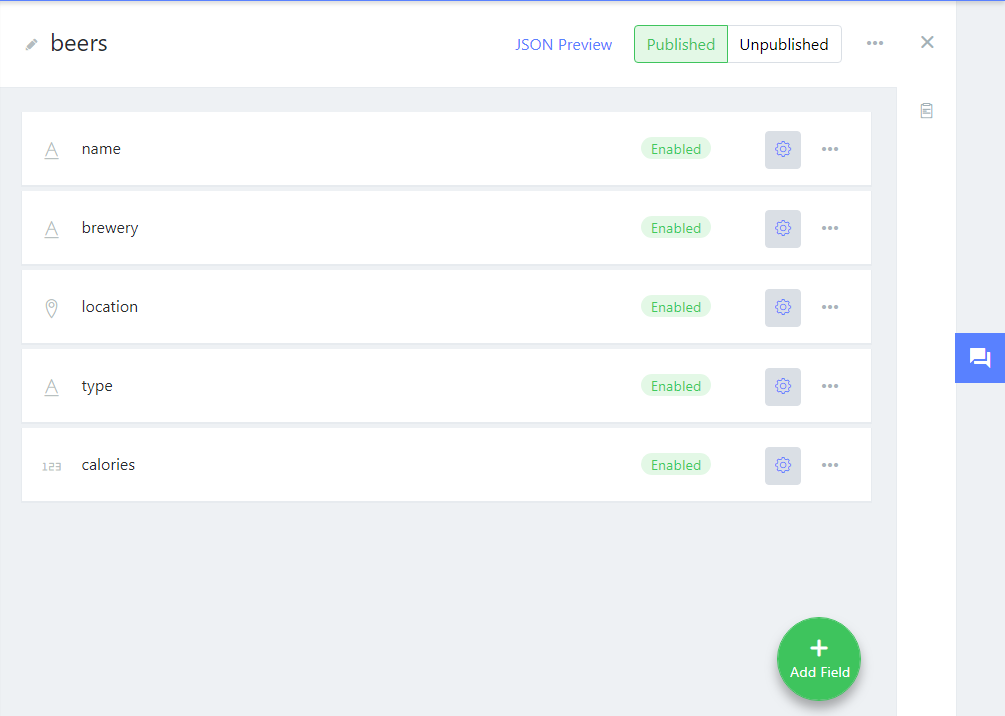
- Create the fields required for our beers:
- name (String Field)
- brewery (String Field)
- location (Geolocation field)
- type (String Field)
- calories (Number Field)
- Once all of the fields are created, click on Published (so it turns green) in the upper right corner.
See the image below, for reference:
- With our API created, we can now add content (in this case beer data) using our API. Squidex makes it easy to do this without requiring you to build a client first.
Simply click the Content button on the left.
Choose the beers schema,
then click the green new button in the upper right corner. - Fill out the form with your favorite beer. If you cannot think of one, Use the data in the screenshot:
- Name:
60 Minute IPA - Brewery:
Dogfish Head - Location: lat:
38.74lng:-75.34 - Type:
IPA - Calories
150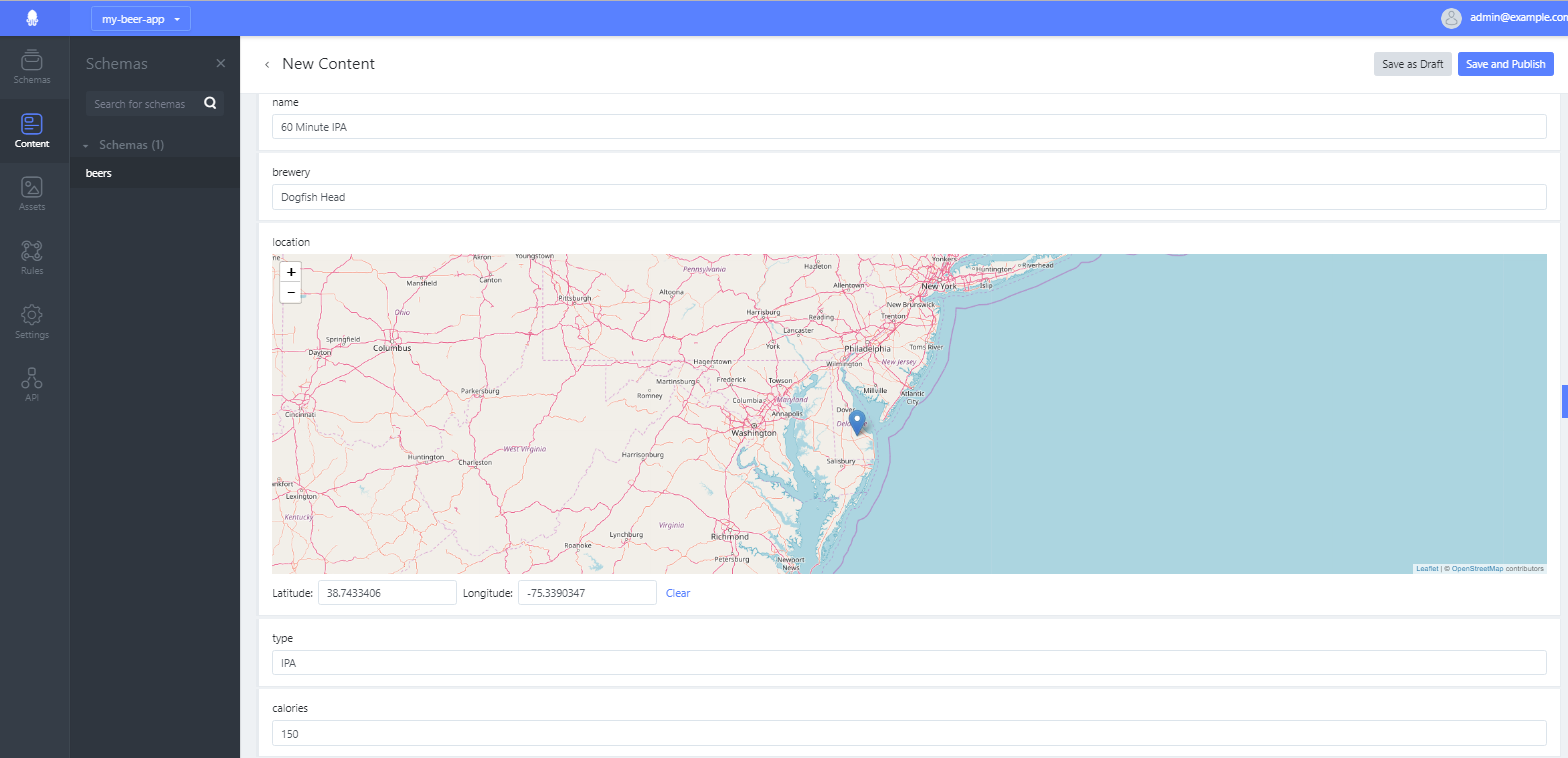
- Name:
- Click Save and Publish to write your data to the schema.
- But we don’t want everyone to use the admin interface to access our data! To do that we’d have to share the Squidex password, which is not practical. We need to expose the API to clients securely. This way programmers can develop a Mobile app so that users can enter this data from their phones or tablets, and we can track developer credentials. Most applications use the Oauth2 https://oauth.net/2/ industry-standard protocol for authenticating to a Web API. This requires a client id and a client secret. We can generate this from the admin interface.
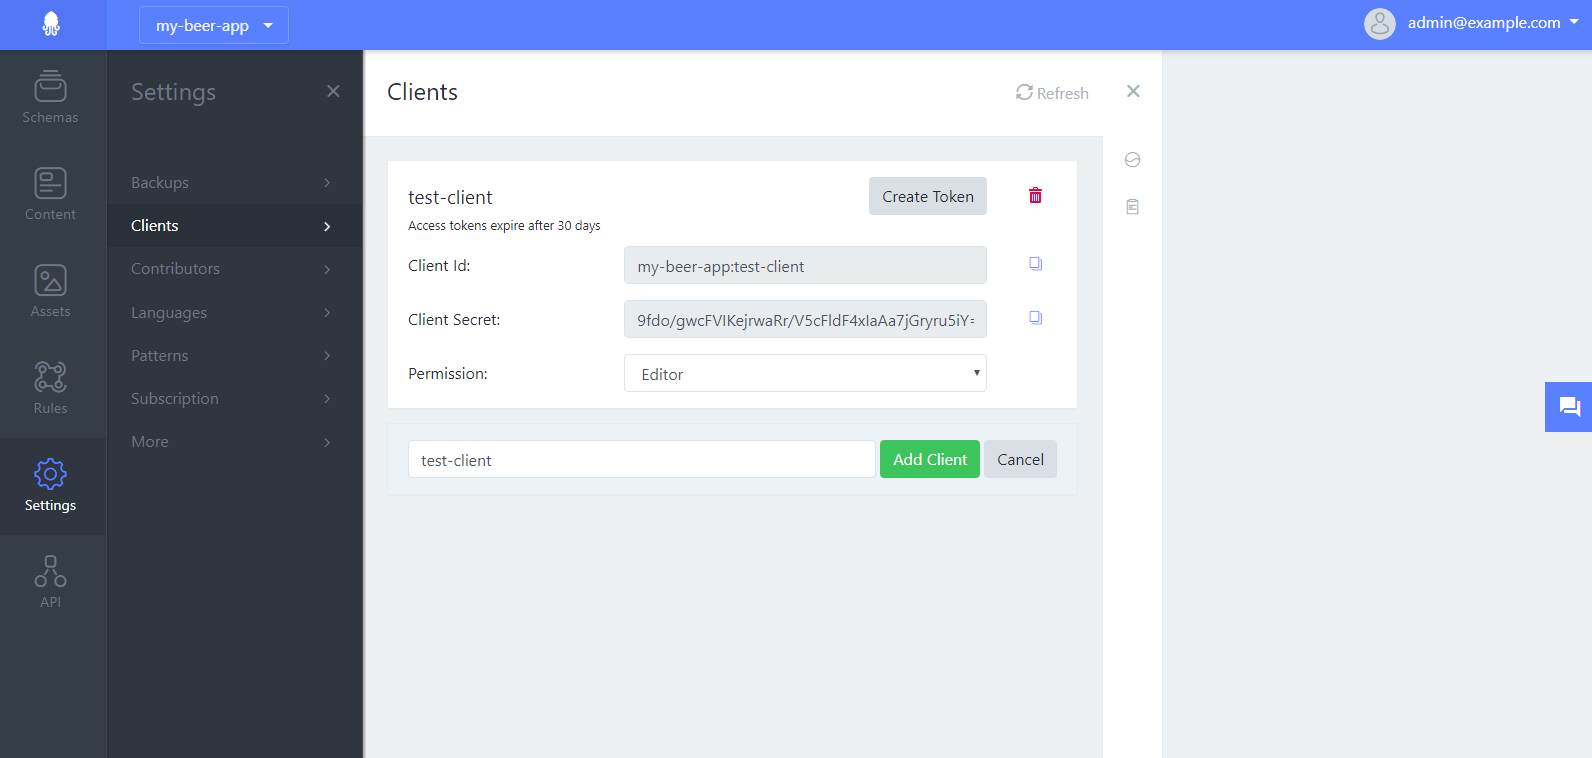
- Click on the settings gear in the left menu.
Then click Clients
And enter:test-clientfor the client name and click Add Client you should end up with something similar to the image below.
-
To access the API you will need to generate an OAuth 2 bearer access token. This is an opaque string, generated from the client secret which provides the bearer of the token access to the API for a limited amount of time. Any client with the access token can access the API with the set permissions for as long as the token is valid.
Typically the access token is generated as requested by an authenticated client. For our case we are just going to generate it within the Squidex user interface. To generate a new token, click the Create Token button. It will show a modal dialog containing your access token.
IMPORTANT copy and paste this token into a blank Notepad or TextEdit document for later use. - Here’s an example of what an access token looks like.
NOTE: This one will not work for you! You must have a copy of your own access token!
Bearer eyJhbGciOiJSUzI1NiIsImtpZCI6IjkxRkRENEVCRDYwNjMxNURFREI4MENEMDkzMERFRkZBMjFEREE2NkIiLCJ0eXAiOiJKV1QiLCJ4NXQiOiJrZjNVNjlZR01WM3R1QXpRa3czdi1pSGRwbXMifQ.eyJuYmYiOjE1NDA2NTI0MzQsImV4cCI6MTU0MzI0NDQzNCwiaXNzIjoiaHR0cDovL2xvY2FsaG9zdC9pZGVudGl0eS1zZXJ2ZXIiLCJhdWQiOlsiaHR0cDovL2xvY2FsaG9zdC9pZGVudGl0eS1zZXJ2ZXIvcmVzb3VyY2VzIiwic3F1aWRleC1hcGkiXSwiY2xpZW50X2lkIjoibXktYmVlci1hcHA6dGVzdC1jbGllbnQiLCJzY29wZSI6WyJzcXVpZGV4LWFwaSJdfQ.wkPN_hl4ftxUPdHdXDh0Yqe7Vl5UIiDYwCuoogG6pzg5WYesWB7DoRxjG22xk3RJl5Wk7ihOyO2GA3QG9dClrk_8Ko_dDVaYOB0AZtikNw5AVXg7vAm0FmApMm9O02gSZqMQ8VQVUIETl64CB_X-5pIlU0_eGnRlWatkWcdLfW9P_Ex9-msMGCfOw0npHGUoLRbZicBVPb37l_n_Zmh2hJBeoJJUKAFLGzkzAQOR1y0xRMwz4W1pGFxPU9-dGSB7nSMNALg55AAoqvJOtrQq1il6qu1Qu681Dvg75BkyRFCkCIn3oSeolksl1SxZwa0OXQlD6mZDTNWTjJXZfAWV_g
- Now lets take a look at the API Squidex has created for us. Click the API button on the left, then choose Swagger.
Swagger is an API documentation tool which automatically generates sample instructions for how any API can be consumed. In our case, Swagger shows us the different endpoints to interact with our content, whether we want to list it, add to it, or change it. - The type of Web API Squidex generated for us is called a REST (Representational State Transfer) API. It’s an architectural style by which URL’s and HTTP verbs are used to initiate operations on data. The 4 verbs we will be using are GET, POST, PUT, and DELETE.
- GET: Retrieves or gets data
- POST: Creates data
- PUT: Updates data
- DELETE: Deletes data
- Spend some time clicking around the API documentation before starting the next part.
Consuming the API from a Client
In this part, we will use the curl utility to consume our Beers REST API. Make sure you enter the access token you retrieved where indicated.
- First let’s connect to the client where we will issue our
curlcommand:
PS C:\ist346-labs\lab-L> docker-compose exec curl-client bash - You are now at the
root@client:/#prompt. Let’s find the beers available. According to the documentation at http://localhost/api/content/my-beer-app/docs we initiate a GET request to thebeersendpoint using our token:
root@client:/# curl -X GET http://squidex_squidex/api/content/my-beer-app/beers -H "Authorization: YOUR_ACCESS_TOKEN"
You should replaceYOUR_ACCESS_TOKENwith the access token you saved from the previous step. For Example, the request with my Token:
root@client:/# curl -X GET http://squidex_squidex/api/content/my-beer-app/beers -H "Authorization: Bearer eyJhbGciOiJSUzI1NiIsImtpZCI6IjkxRkRENEVCRDYwNjMxNURFREI4MENEMDkzMERFRkZBMjFEREE2NkIiLCJ0eXAiOiJKV1QiLCJ4NXQiOiJrZjNVNjlZR01WM3R1QXpRa3czdi1pSGRwbXMifQ.eyJuYmYiOjE1NDE1Mzc4NjIsImV4cCI6MTU0NDEyOTg2MiwiaXNzIjoiaHR0cDovL2xvY2FsaG9zdC9pZGVudGl0eS1zZXJ2ZXIiLCJhdWQiOlsiaHR0cDovL2xvY2FsaG9zdC9pZGVudGl0eS1zZXJ2ZXIvcmVzb3VyY2VzIiwic3F1aWRleC1hcGkiXSwiY2xpZW50X2lkIjoibXktYmVlci1hcHA6dGVzdC1jbGllbnQiLCJzY29wZSI6WyJzcXVpZGV4LWFwaSJdfQ.nzH1tpARXqIHsACJ0gNMYnXytsw21JblGoIQZJqZlUJV7wY6Fc6IHqVAfHai7mvPv0qgVdXLxXDBCwup4Ze25VM5kkf0df6ObH6ucl-DQjowdJB8aLIgLTezq1d899oowz_BtS4e7-Rk4BFVtGnHE-TXAM_CHiNl9IMZbdNpgyoR4GoSdRsqBkERzyYHcvEkqQRJL-BpkTzAXsJJB1TOP-37fIsQXEEQ2rmmZ49WEvTs3P_a_sy1KQ94X4x0gJE9kAkLRnAtHjWjrTo0PAqpeVccdhOcsosqaRjDSt6e4lilVtuNXiQVnQWg83Ge40My67zNG2Er1bQQIruXp0LfSw"
Your response should include output like this:{"total":1,"items":[{"id":"7e6218c6-0734-4bbb-a615-afdedddde415","createdBy":"subject:5be1d4ab62b8c60001189ebf","lastModifiedBy":"subject:5be1d4ab62b8c60001189ebf","data":{"name":{"iv":"60 Minute IPA"},"brewery":{"iv":"Dogfish Head"},"location":{"iv":{"latitude":38.74,"longitude":-75.34}},"type":{"iv":"IPA"},"calories":{"iv":150}},"isPending":false,"created":"2018-11-06T18:13:01Z","lastModified":"2018-11-06T18:13:01Z","status":"Published","version":1}]} - The data is output in JSON, or JavaScript Object Notation format. This is a common data exchange format for REST API’s. If you look through the data, you can find our 60 Minute IPA that we entered through the Squidex web UI.
JSON formats the data in key-value pairs. For example"total":1let’s us know the API returned 1 item (the only beer we have right now). - Let’s fix this by adding add another beer, not using the Squidex UI, but through the REST API. For this we execute an HTTP POST to the
beersendpoint. Do not forget to replaceYOUR_ACCESS_TOKENwith your bearer token. Type:
root@client:/# curl -X POST http://squidex_squidex/api/content/my-beer-app/beers?publish=true -H "Accept: application/json" -H "Content-Type: application/json" -H "Authorization: YOUR_ACCESS_TOKEN" --data '{"name": {"iv": "Summer Ale"},"brewery": {"iv": "Samuel Adams"},"location": {"iv": {"latitude": 42.36,"longitude": -71.06}},"type": {"iv": "American Pale Wheat Ale"},"calories": {"iv": 150}}'
Here we are posting--datato add the Sam Adams Summer Ale to our collection of beers. - If it works you will see the JSON output in your console window. Importantly you should see
"createdBy":"my-beer-app:test-client"indicating the client we used to initiate the POST added the record.
If you return to the Squidex UI here: http://localhost/app/my-beer-app/content/beers You should now see TWO beers! Furthermore the Summer Ale* was indeed created by the bearer token using **my-beer-app-client.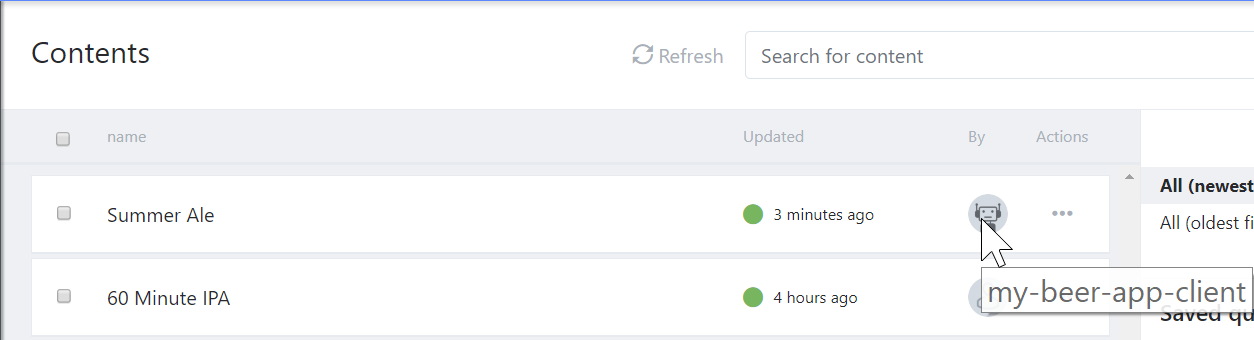
- Back at the
root@client:/#command line let’s query thebeersendpoint with an HTTP GET so we can see there are now 2 beers when we query the API. Again replaceYOUR_ACCESS_TOKENwith your bearer token.
root@dclient:/# curl -X GET http://squidex_squidex/api/content/my-beer-app/beers -H "Authorization: YOUR_ACCESS_TOKEN"
And the JSON output now has both beers and a"total":2. - A little tangent. Why must we include the bearer token with every API call? Is this really necessary? Isn’t there a way to save the token so we don’t have to keep sending it? The answer is no! The HTTP protocol is stateless. This means that the requests do not know about each other. Because each request is completely isolated from the other we must include our credentials with every request. That’s right. When you “log on” to a website, it saves a similar token and that token goes back to the server on every request to make sure “its really you” and that you are still “logged in.” Such is the way of the web!
- You can also update an item by using the HTTP PUT or HTTP PATCH verbs. PUT is for replacing the entire record, and PATCH is for partial updates. Let’s fix the calories for our 60 minute IPA which says 150 but should be 209. To do this we will need the value of the
idkey for this beer to the endpoint. You should be able to find it in your JSON output from the previous command, or by clicking on the beer in the Squidex UI and then reading it off the URL. My screenshot demonstrates this but your ID will be different from mine!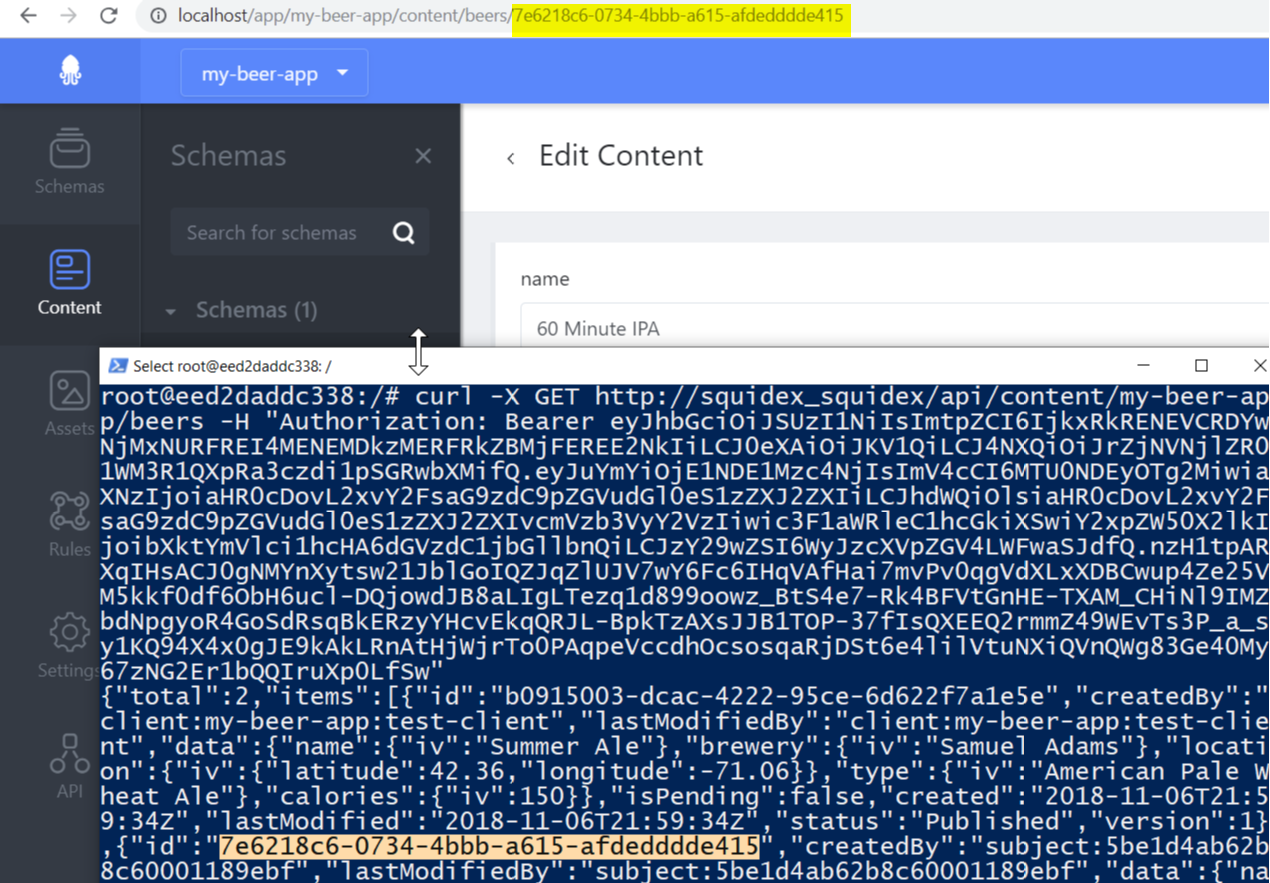
- Once you have the id, we can attempt an update. Since we only want to update the calories and not the entire set of fields, we use PATCH. Again replace
YOUR_BEER_IDwith theidof the 60 minute IPA and replaceYOUR_ACCESS_TOKENwith your bearer token.:
root@dclient:/# curl -X PATCH http://squidex_squidex/api/content/my-beer-app/beers/YOUR_BEER_ID -H "Accept: application/json" -H "Content-Type: application/json" -H "Authorization: YOUR_ACCESS_TOKEN" --data '{"calories":{"iv":209}}'
If the update works you will see the output{"calories":{"iv":209}}. You can check the change in the Squidex UI or by executing the HTTP GET command again. - To remove and item you will use the DELETE verb. Once again you need an
idso let’s remove the 60 Minute IPA. Try this:
root@dclient:/# curl -X DELETE http://squidex_squidex/api/content/my-beer-app/beers/YOUR_BEER_ID -H "Accept: application/json" -H "Content-Type: application/json" -H "Authorization: YOUR_ACCESS_TOKEN"
You’ll see no output but if you look at the Squidex UI or execute the GET you will see there is now only the American Pale Wheat Ale
Even though you are using curl this is exactly how other application and clients interact with web API’s. If we built a mobile app or Website, the code on the app or site would perform these same commands to communicate with the API!
Tear Down
- First Exit the curl client:
root@client:/# exit - Tear down the environment:
PS ist346-labs\lab-L> docker-compose down
Questions
- What is Squidex? What is the goal of Squidex?
- what is OAuth 2?
- What is an OAuth 2 access token? What is the relationship between it and the client secret and client id pair?
- What is Swagger?
- Why must we include the bearer token with every API call? How come there is no short-cut method where we login one and it persists for the entire session?
- What is a REST API and what are the common HTTP verbs used in REST?
- Which HTTP verbs did we demonstrate as part of the calling the API as the client?
- What is the difference between a PATCH and a PUT?